Custom Ammo UI
You can create a custom ammo HUD for your weapons. It might look like these:
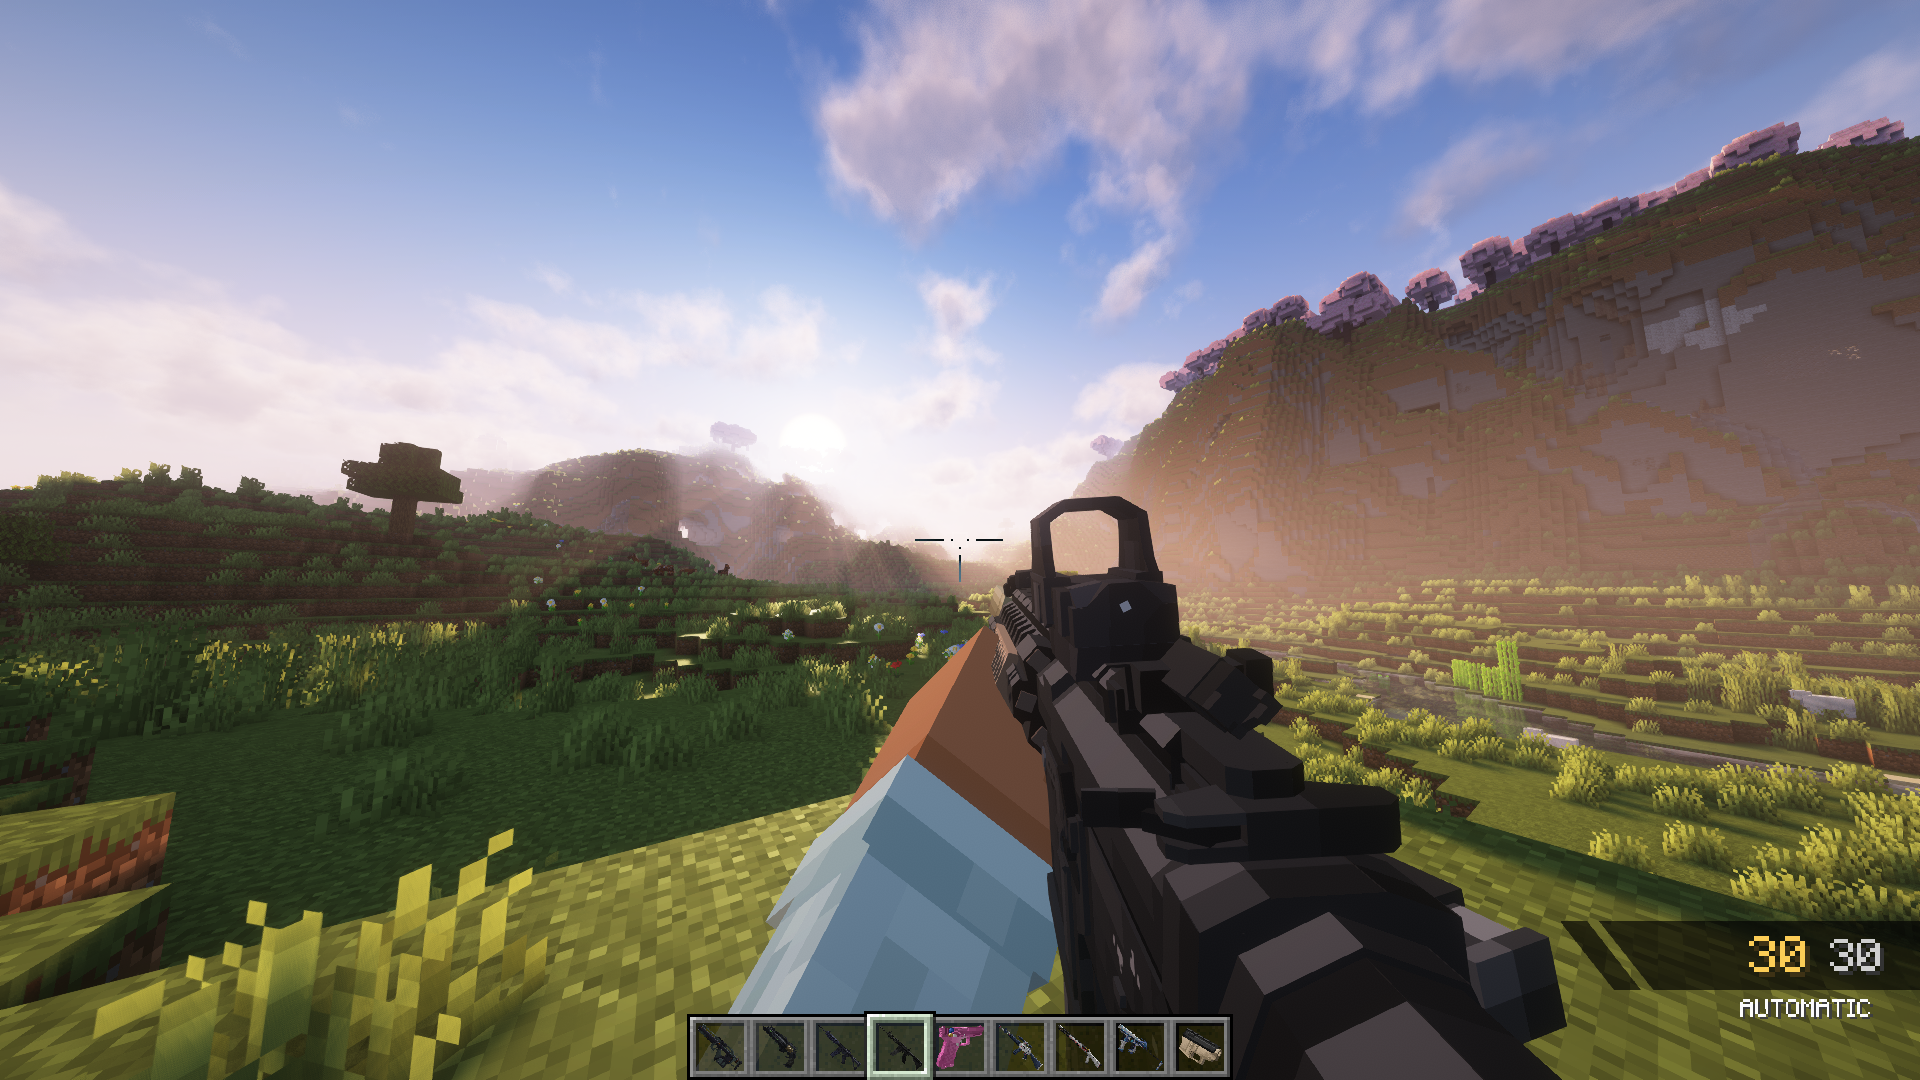
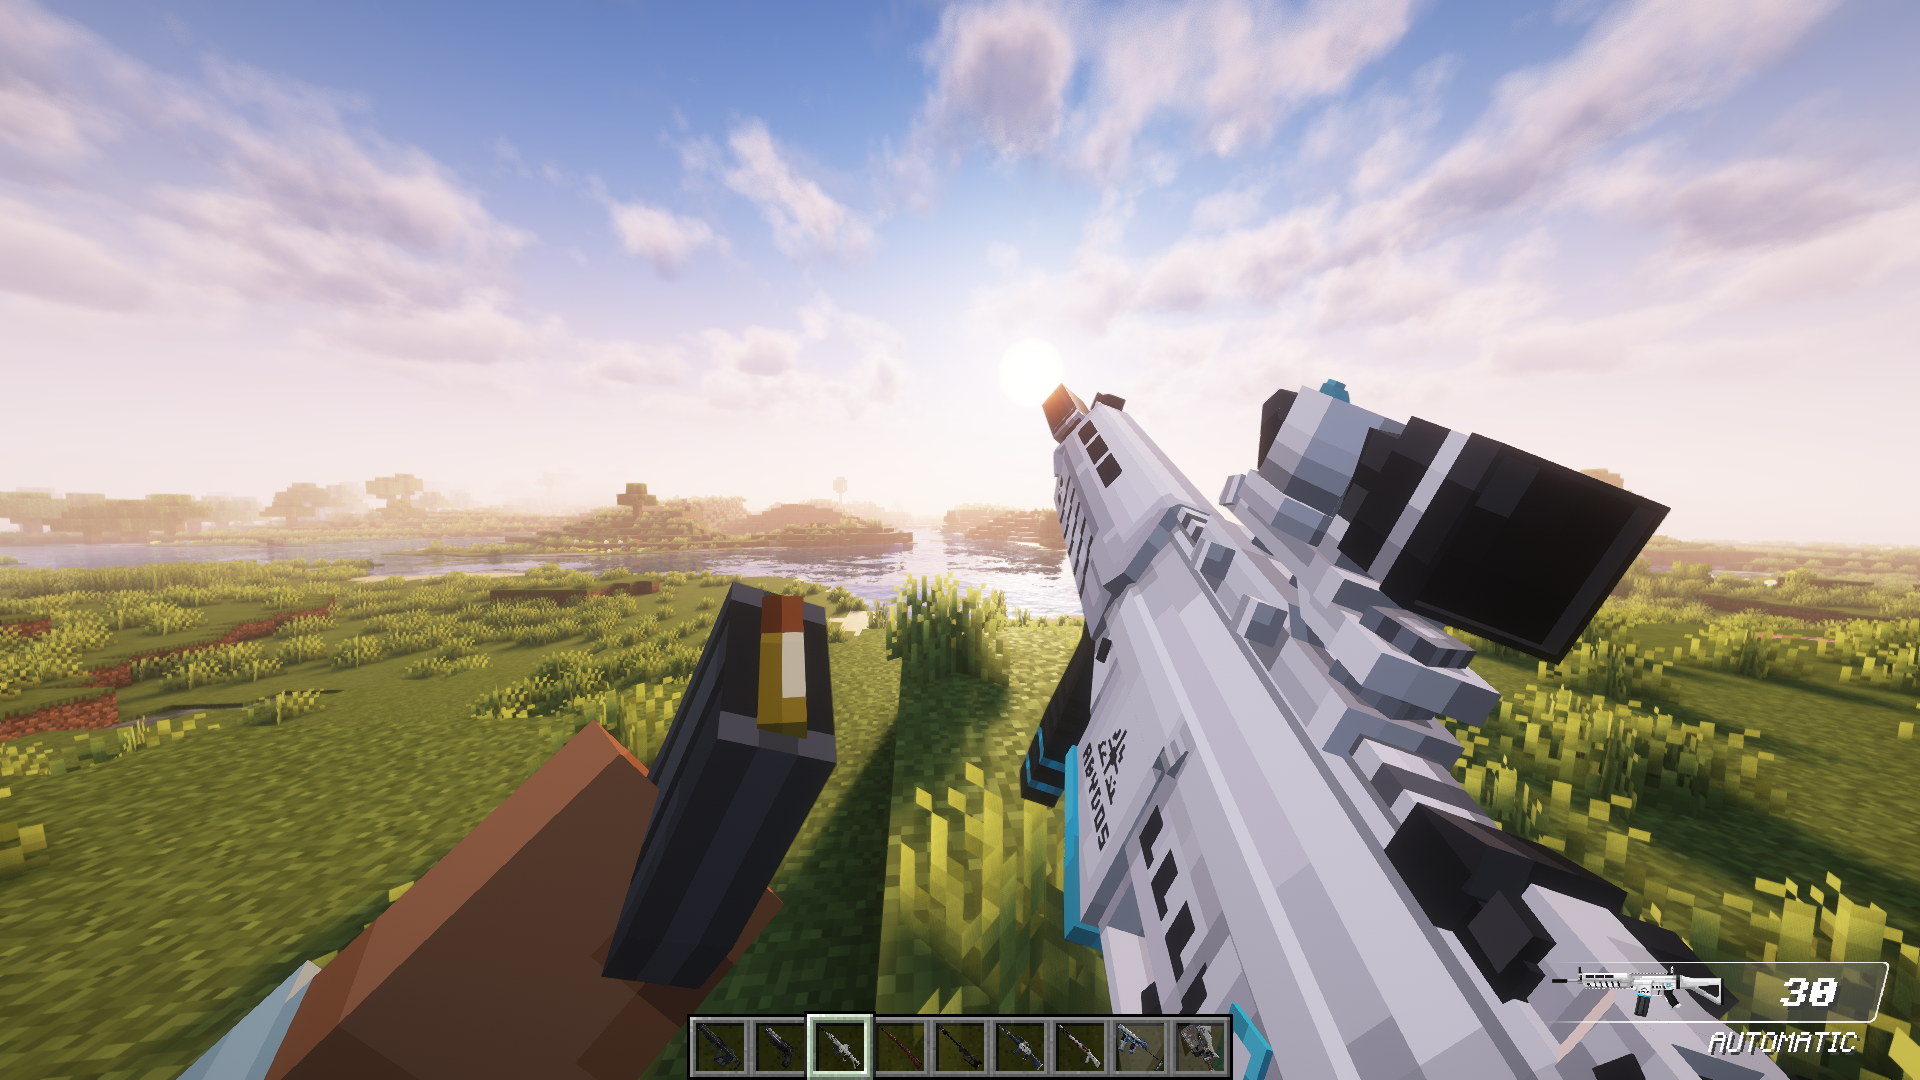
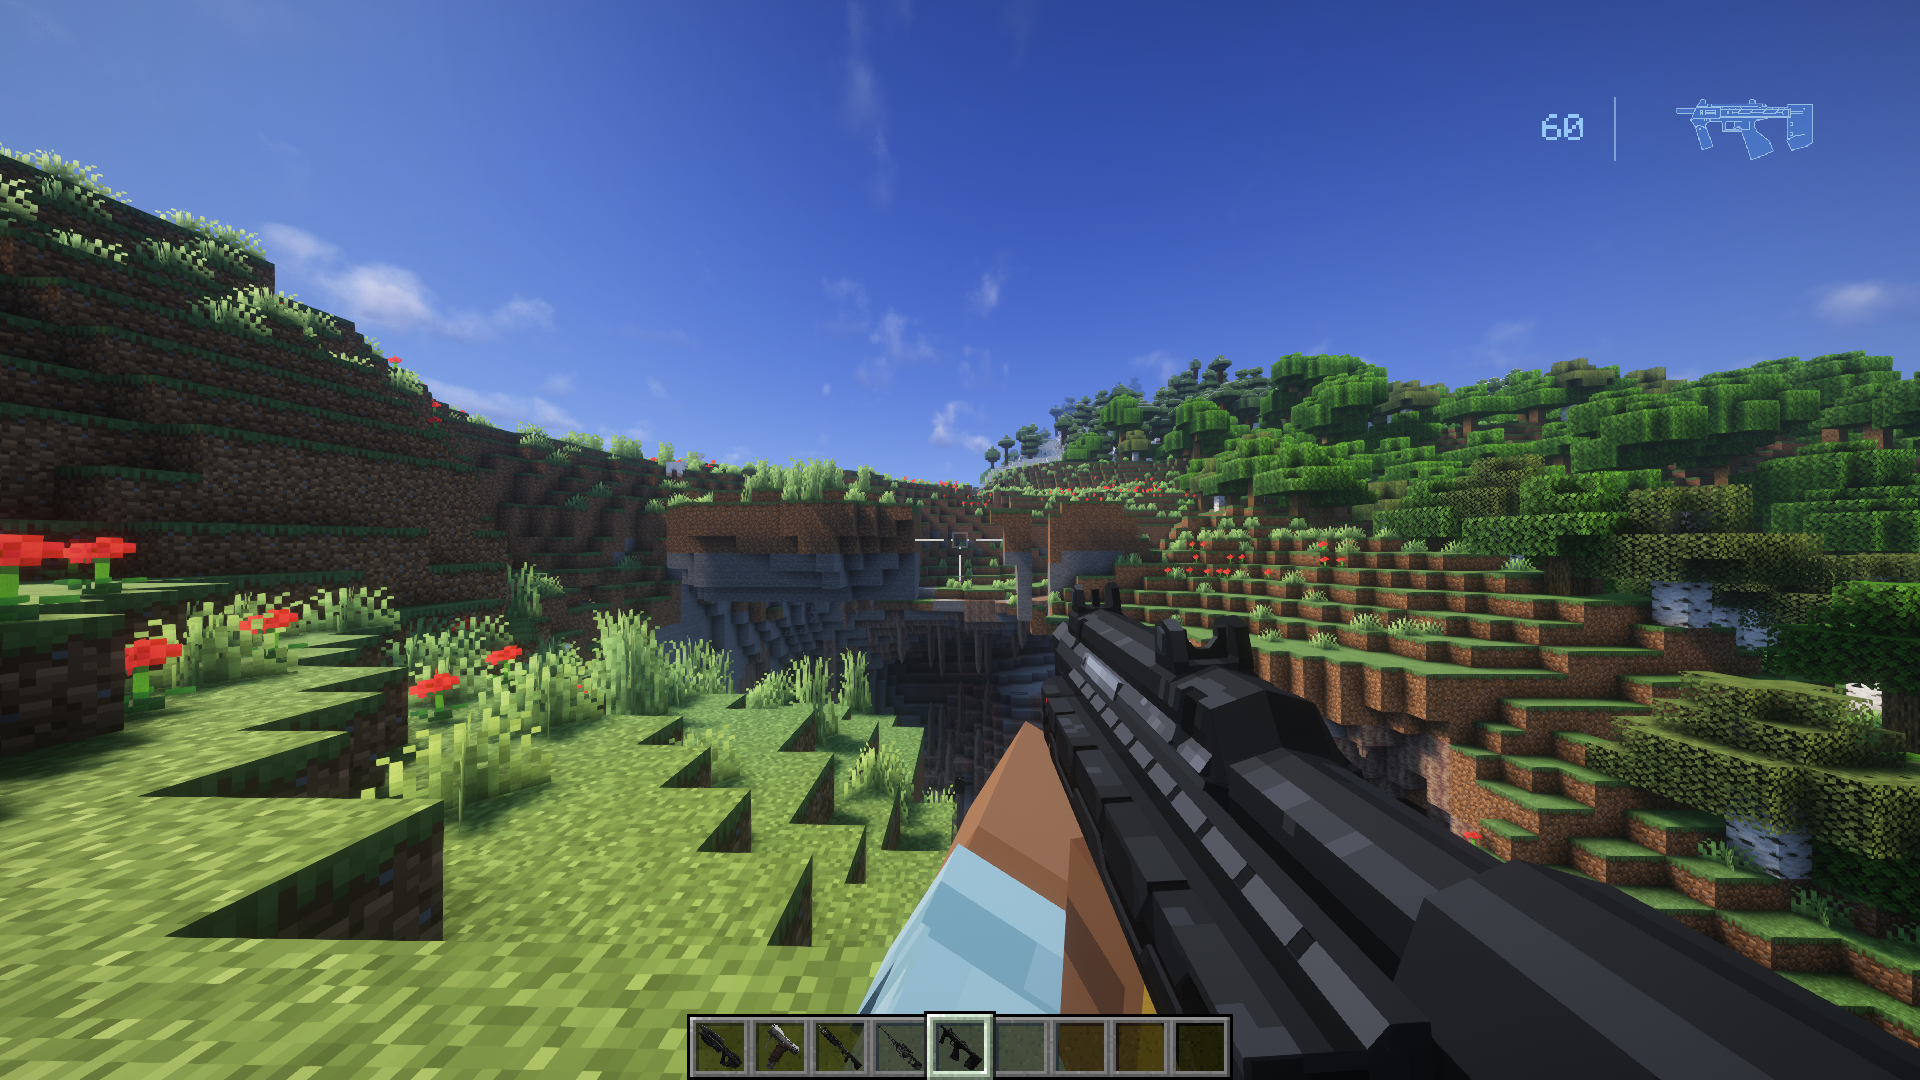
Essentially, a custom UI will replace Point Blank’s default ammo UI. The UI is defined per gun, like so:
"ammoUi": "packname_gun_ui"This new line goes inside your gun JSON, and it asks the game to refer to a new UI JSON you’ll be creating when holding the weapon in-game.
Example of UI being used for a gun in the Blue Archive pack:
{
  "name": "ba_ariusar",
  "type": "Gun",
  "maxAmmoCapacity": 30,
  "compatibleAmmo": [
    "ammocreative",
    "ammo556"
  ],
  "damage": 5,
  "ammoUi": "ba_ariusar_ui",
  "fireSound": "ba_ariusar",
  "fireModes": [
    "AUTOMATIC"
  ],
  "rpm": 800,
  "gunRecoilInitialAmplitude": 0.2,
  "shakeRecoilAmplitude": 0.35,
  "shakeRecoilSpeed": 2,
  "viewRecoilAmplitude": 1.2,
  "sustainedRecoil": {
    "posZCap": 0.12,
    "posZIncrement": 0.04
  },
  "compatibleAttachmentGroups": [
    "ar_muzzle",
    "ar_sightsandscopes",
    "underbarrel"
  ],
  "compatibleAttachments": [
    "cantedrail"
  ],
  "defaultAttachments": [
    "ba_arius_aimpoint",
    "stubbygrip"
  ],
  "features": [
  ],
  "phasedReloads": [
  ],
  "effects": [
  ],
  "inspectAnimations": [
  ],
  "idleAnimations": [
  ],
  "drawAnimations": [
  ]
}
Here, the Arius AR uses a UI called ba_ariusar_ui.
ba_ariusar_ui is the name of another JSON file that’s defined in packname/assets/pointblank/ui.
All UI JSONS go inside this new ui folder.
Inside the new JSON, there are many options for setting up a custom UI, including the text, the texture the UI uses, and more:
{
  "name": "ba_ariusar_ui",
  "texture": "textures/gui/ba_ariusar_ui.png",
  "ammoText": {
    "x": 84,
    "y": 105,
    "size": 1.35,
    "color": "#ffffff",
    "emptyColor": "#ff0000",
    "border": false,
    "dropShadow": true,
    "italic": true,
    "bold": true,
    "digitalStyle": true
  },
  "fireModeText": {
    "x": 60,
    "y": 123,
    "size": 0.95,
    "color": "#ffffff",
    "border": false,
    "dropShadow": true,
    "italic": true,
    "bold": false,
    "enabled": true
  },
  "size": {
    "width": 120,
    "height": 120
  },
  "reloadText": "--",
  "padding": {
    "x": 10,
    "y": 19
  },
  "location": "bottom_right"
}
name defines the name of the ui. This is what the gun JSON is looking for.
texture defines what texture file the UI is looking for.
ammoText is where all the information on the text of the ammo is designed. x and y positions, size, color, emptyColor (defines what color the ammo uses when the gun’s ammo is empty), and more. You’ll see inside ammoText, there’s an option digitalStyle true or false. digitalStyle makes the ammo text display with a digital zero where needed. For example, if your gun is at 5/10 rounds, the counter will display as 05. If digital style is turned off, it’ll display as 5.
firemodeText is where the firemode text (automatic, single, custom firemodes, etc.) is designed. You can choose also not to have a firemode display by turning enabled here to false.
Next, size is where the overall size of the entire UI is defined. Keep in mind that if you adjust this, you’ll need to reposition the x and y values of the different texts.
reloadText is where you can define what text displays for the ammo count while the gun is reloading. In Point Blank, the text usually displays ‘Reloading…’. Here in this example, the reloadText is -- meaning while the gun is reloading, the ammo counter will be temporarily replaced with --.
padding defines the space between the UI and the edges of the screen.
location defines the location of the UI. It can be bottom_right, bottom_left, top_right or top_left.
An extra feature you can define is inertia. If inertia isn’t defined, like in the above example, the UI will not have inertia. Otherwise, when defined, the UI in-game will have a smooth motion that triggers when the player moves their view.
Example of custom UI with inertia enabled:
{
  "name": "halooff_m7smg_ui",
  "texture": "textures/gui/halooff_m7smg_ui.png",
  "ammoText": {
    "x": 14.5,
    "y": 23.5,
    "size": 1.25,
    "color": "#96c9ff",
    "emptyColor": "#66cfff",
    "border": false,
    "dropShadow": false,
    "digitalStyle": true
  },
  "size": {
    "width": 130,
    "height": 130
  },
  "fireModeText": {
    "x": 5,
    "y": 123,
    "size": 0.95,
    "color": "#ffffff",
    "border": false,
    "dropShadow": true,
    "enabled": false
  },
  "reloadText": "--",
  "inertia": 0.35,
  "padding": {
    "x": 10,
    "y": 15
  },
  "location": "top_right"
}
After you’re done setting up your ammo UI JSON, the final thing to do is set up a texture png. This is the texture defined in texture, and the png should be located in textures/gui. It might look something like this:
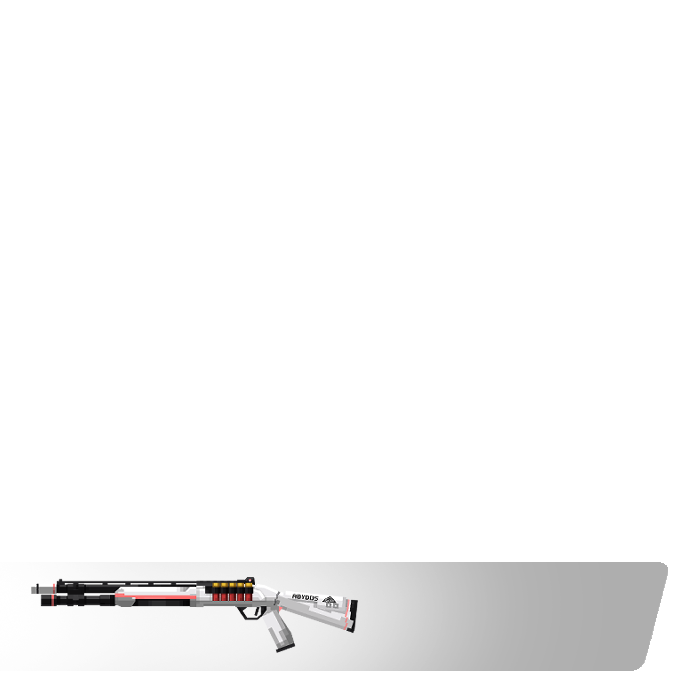
This particular texture is high resolution. You can also try different resolutions, (this is untested at the moment).